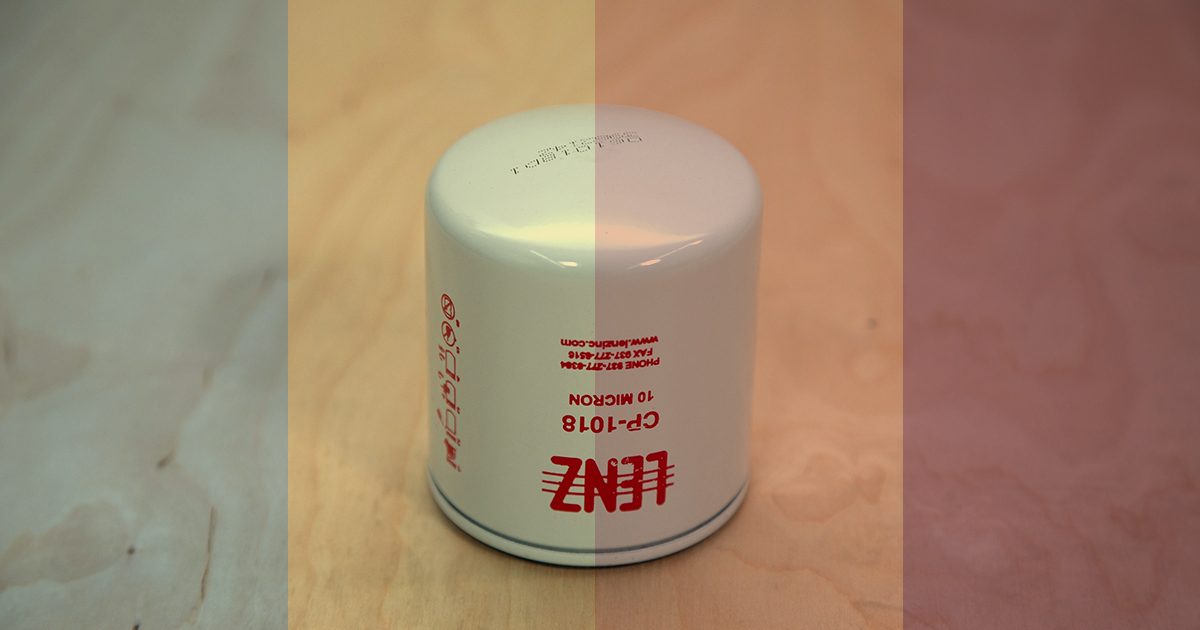
Screw On Style Oil Filter With Brand Colors Overlaid on the Image

Change the Oil Filter on Your Cold Press Juicer: A Step-by-Step Guide

All Juiced Rite cold press juicers depend on clean food-grade oil for the hydraulic system to function. We’ve designed them to be easily maintained by the owner or operator.

In this guide, we’ll show you the process for replacing your juicer’s oil filter.

What you’ll need:

For this job, you’ll need the following items:

  • A new oil filter – buy it here
  • An oil filter wrench (optional, only use this tool for tough filter removal)*
  • Citrus de-greaser
  • Rag for cleaning and wiping extra oil
  • Oil pan
  • Masking tape (optional, see #Pro Tip below)

*Regular filter changes every six months should lend to easy removal by hand with no wrench needed.

Before We Begin

  1. SAFETY FIRST! As with any cleaning or servicing of your equipment – ALWAYS turn off the power and unplug your machine before working. You can turn the main power off at the red switch on the back of the machine located on the electrical box.
  2. Next, clean the outside of the filter with some de-greaser before removing it. Clean up any oil residue and food particles well. This will prevent any contaminants from entering the oil system.

Locate the Oil Filter

While the chute is facing you, look in the space below the platens (in the belly of your machine, if you will). You will see a canister to the right — that’s your juicer’s oil filter!
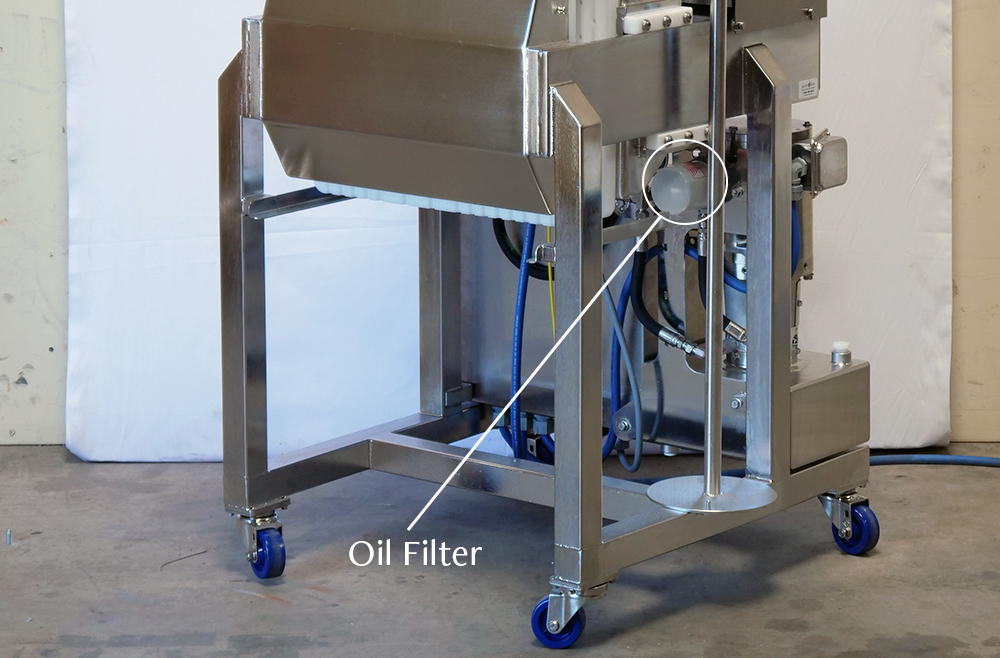
Photo showing the location of oil filter on a M100R4 cold press juicer
Oil Filter Location on an M100R4

Remove the Worn Filter

  1. Place an oil pan under the machine directly below the filter location. Have a rag nearby to catch any drips and keep your area clean.
  2. Use your hands (or a wrench if needed) and spin the filter to loosen it (Lefty Loosey!). Expect some oil to fall out initially — this is normal. If the oil looks sludgy and dark, you are in need of a full oil change.
  3. Once the dripping has stopped, remove the filter fully and set it in your oil pan.

#PRO TIP: Dripping oil can get a little messy (sometimes a lot messy!). Before loosening your filter, hang a long strip of tape from the fitting at the bottom of the oil filter. Let the tape hang down to your pan. When you remove the filter, the oil will follow the tape and drip straight into the pan! This keeps your system, hoses and tank clean, AND it’s a less messy clean-up for you — that’s a win/win/win!

Prepare Your New Filter for Install

  1. Next, unwrap the plastic from your fresh filter. Make sure there’s no debris inside of it. Tap the open end of the filter with the rubber seal on your hand, look inside, and give it a little blow (some debris are small). Make sure it’s nice and clean and, most importantly, empty.

Install the New Oil Filter

  1. If your oil is clean and clear, use it to lubricate the rubber seal of the oil filter and the threads. You can dip the filter into the pan to get a decent amount of oil on there and then let it drip off (give it a little wiggle to speed that up).
  2. Check the threading on the machine itself where you will be reinstalling. Make sure it has no crud, produce, nicks or anything on the surface where the rubber gasket will make contact.
  3. Align the threading with machine as best you can. It should go on very easily. If you feel any resistance at all, stop, back up and start again. Too much force may cause cross threading which could lead to leaks.
  4. Once the filter is in place, hand-tighten it until it is as snug as you can get it. No tools required! (Avoid the temptation to use a wrench to install the filter, even if you used one to uninstall)
  5. Make sure the outside of the filter is clean and you’re done!

Keep In Mind

  • The first few times you use the juicer after your oil filter change, the hydraulic system may loosen it. This happens when the cylinders release pressure and rush fluid into the filter. Reach down periodically and hand tighten the it until the pressure has evened out.
  • Over time, the rubber seal will also compress and loosen, which can cause minor leaks. To prevent this, check the filter monthly and tighten when needed.
  • To check for drips, just swipe your clean, dry finger along where the filter connects to the juicer. If it’s dry, it’s tight enough. If your finger has a little oil, give the filter a little hand tightening (again, no tools).
  • Old and worn filters are one of the leading causes of system failure. Change them on a set schedule to keep your juicer in great shape!

When should I change the oil filter?

The oil filter on your cold press juicer should be changed at least every six months to help keep your oil clean and free of impurities (here’s the maintenance schedule we recommend). This can change depending on how frequently your juicer is used. Ideally, your oil and filter should be changed at the same time.

Need More Info? Get in touch!

Social Media

Subscribe to
OUR Juicy Newsletter

We’ll send new article alerts & product updates. 

Juiced Rite, LLC

Related Posts

🎁 Save 15% on orders over $1500! Ends Dec. 20th ⏳